Archive for the ‘Virtualization’ Category.

Android Virtual Device (AVD) extremely slow

So I started to look at writing an Android app. I took a class on Android and wrote a prototype Android App in fall of 2011. Well, I have a need to write an Android App again.

I am a C# developer and while I am comfortable with Java, I prefer C# so I am going to use MonoDroid.

I installed everything very easily using the MonoDroid installer. However, when I went to launch an Android Virtual Device (AVD) it seemed to start but even after leaving it over night, it didn’t finish booting.

So I did some research and the recommendation was to install the Hardware Accelerated Execution Manager.

So I had to:
1. Open the Android SDK Manager and install the Intel x86 Emulator Accelorator (HAXM).

2. Run the installer I found here:
C:\Users\jbarneck\AppData\Local\Android\android-sdk\extras\intel\Hardware_Accelerated_Execution_Manager\IntelHaxm.exe

After that, opening an AVD was plenty fast.

Sharing checked out source between Visual Studio instances on Virtual Machines using a network share

I have a lot of Virtual Machines and having to checkout a large code base from source control to each box is annoying and time consuming. There are a couple of branches that take almost an hour to get the latest code.

I am using Visual Studio and TFS. Visual Studio and TFS is installed on all my VMs. So I set out to have the VM host store the source and then all the Virtual Machines map a drive to the host.

At first this appeared to work just fine, but then I started to run into errors. I fixed the errors one at a time.

There were a few things I had to do to make this work and I thought I would share them:

System Changes

  1. Map the drive and make it persistent. That means the drive stays mapped after reboot.
  2. Add the mapped drive as a local intranet site in Internet Explorer’s Security settings.

Visual Studio Changes

  1. Make sure to always log into to TFS in Visual Studio with the same user account. There will be TFS problems if you use a different user account.
  2. Add the loadFromRemoteSources tag to the section of the devenv.exe.config file and set it to true:

    Note: I had to run Notepad++ as administrator to make this change.

    Visual Studio 2010:
    C:\Program Files (x86)\Microsoft Visual Studio 10.0\Common7\IDE\devenv.exe.configVisual Studio 2012
    C:\Program Files (x86)\Microsoft Visual Studio 11.0\Common7\IDE\devenv.exe.config

  3. Add the loadFromRemoteSources tag to other .config files.
    Note: In order to debug a web service, I had to also add this tag to the  WcfSvcHost.exe.config.

    Visual Studio 2010:
    C:\Program Files (x86)\Microsoft Visual Studio 10.0\Common7\IDE\WcfSvcHost.exe.config

    Visual Studio 2012
    C:\Program Files (x86)\Microsoft Visual Studio 11.0\Common7\IDE\WcfSvcHost.exe.config

    In that IDE folder there were a 22 .config files in VS 2010 and 32 in VS 2012. I am not sure which ones will ever need this. There are two schools of thought: 1. Add the loadFromRemoteSources tag to all of the config files or 2. Add them only when you encounter and error. Since I am in a lab environment and everything is on one physical box (the host and the hosted VMs) I went ahead and added this to all the config files.

  4. Sometimes when running Visual Studio as administrator, the mapped drive appears off line. Simple click File | Open | File and browse to the network drive. You don’t have to actually open anything. Just click cancel. It seems as soon as you browse to the mapped drive, Visual Studio knows about it and everything works fine.This doesn’t seem to work as well in VS 2012 on Windows Server 2012.  You may even have to have the drive mapped twice. Once as the logged in user and once as the Administrator. To do this open two command prompts: 1. A regular command prompt. 2. A command prompt running as Administrator. Run the mapped drive command in both: (Yes, use the same drive letter in both on Windows 2013 or Windows 8)

    net use z: \\pcname.domain.tld\yourshare /PERSISTENT:YES

Be aware you’ll get more prompts

I noticed than when running executables orVBScripts or PowerShell scripts, that I was prompted. This is because your running them from a network share, which is completely fine as long as you trust the network share.

Conclusion

Having all your Virtual Machines share the same source repository is possible and saves a lot of time checking out code as you don’t have to do it an each Virtual Machine.

Doing this for multiple users did not work well as the we used TFS and the source seemed to be tied to the user.

I have not yet tried to share between VS 2010 and VS 2012. I hope that works…I’ll update when I know.

Best Practices for Preparing a Windows Virtual Machine

If you use Virtual Machines  in your lab (either with Hyper-V, VMWare Workstation, Virtual Box or other), you probably would love to have a list of steps to create a nice usable Virtual Machine. There are probably annoyances you have with your Virtual Machines that if you only knew how you could make them go away.

Also, it is frustrating to revert and have to redo settings, so knowing when is best to snapshot is also nice.

This document is to help you with just that: Creating the perfect Virtual Machine that is easy to use and avoids annoyances.

Note: I have been using VMWare Workstation since 2004. I have also used ESX, Virtual Box, and Hyper-V. I have worked with lab environments the most, but I have also worked with Virtual Machines in production and consider myself highly experienced.

Setting up a new Virtual Machine

Note: These steps provide general guidelines for when to snaphsot

  1. Create a new VM in your favorite Virtual Machine Manager.
    Note: I have used VMWare Workstation and ESX, Virtual Box, and Hyper-V and find I like them all fine.
  2. Use a very large disk image size, but do not choose to use allocate disk space now.
    Note: It is very frustrating to run out of space, so avoid this.
  3. Delete the floppy disk if the hardware configuration has one.
    Note: VMWare workstation will annoy you to no end if you leave a floppy on the system.
  4. Install Windows.
  5. Note: Do not activate or enter a Product Key if it allows you to skip this step.
    Note: I will use Windows Server 2008 R2 for this example.
  6. Create a snapshot called “Clean Install” here.
  7. Apply all patches and updates and driver updates.
  8. Add a secondary admin account in case you forget the primary admin account.
  9. Create Snapshot called clean install with Patches.

Windows Activation

If this is to be a base OS to use to clone other Virtual Machines, never activate the base Operating System, only activate a Virtual Machine after it has been cloned and after you are sure the Virtual Machine will not be discarded as lab Virtual Machines can be discarded often.

Activation can be a delicate balance. You don’t want to active every time, but at the same time, you don’t to revert a virtual machine and have to activate again. As soon as you know you will use the Virtual Machine for a while, activate it and snapshot it. Hopefully you never have to revert to a state before it was activated.

Making the Virtual Machine Easier to Use

Allow the Virtual Machine to Shutdown from the Login Screen

  1. Run gpedit.msc to launch the Local Group Policy Editor.
  2. Click to expand Computer Configuration | Windows Settings |Security Settings |Local Policies | Security Options.
  3. Scroll down in the right pane and right click on “Shutdown: Allow system to be shut down without having to log on” and choose Properties.
  4. Click Enabled and then OK.

Disable the shutdown event tracker

Virtual Machines, especially in a lab, shutdown often and unlike production machines, tracking these shutdowns is not necessary, so lets turn this off.

  1. Run gpedit.msc to launch the Local Group Policy Editor.
  2. Click to expand Computer Configuration | Administrative Templates |System.
  3. Scroll down in the right pane and right click on “Display Shutdown Event Tracker” and choose Edit.
  4. Click Disabled and then OK.

Disable Internet Explorer Enhanced Security Configuration

It is a pain in a lab to be prompted on every web site and for every download. Labs usually trade security for speed and agility.

  1. Go to Server Manager.
  2. Under Security Information on the right, click on Configure IE ESC.
  3. Set the values to Off.
  4. CLick OK.

Making the Virtual Machine more efficient

Turn off unnecessary services

If you need to run a lot of Virtual Machines and you need to squeeze every last bit of processor power out of your Virtual Machines, then they should only run the bare minimum they need to run.

Make a list of services you do not need but are running by default and disable them.

Note: Google search for “Services you can turn off in Server 2008” or whatever Operating System you are using.

Note: Often developers install Visual Studio, which includes SQL Express, and even if they never use SQL Express, they leave the service running. Stop such services and set them to manual so they don’t restart every reboot.

Software on the Virtual Machine

Install commonly used software

This one appears easy at first. However, it is different and there is more to it than you think.

  1. Make a list of software you use on your Virtual Machine. Here are a few examples:
    Notepad++
    7zip
    Acrobat Reader
    Firefox or Chrome (or your favorite browser)
    etc…
  2. Install your desired software.
  3. Update your software.
  4. Snapshot.

Delete Unique Values for Some Software

If you are going to use this as a base Virtual Machine to clone other Virtual Machines, then you don’t want anything that should be unique to be the same on each machine. Any software that has unique values should have those unique values removed. I’ve seen VPN software have unique values, the LANDesk Agent, etc… Remove these unique value before you Sysprep.

Using Virtual Machines with Active Directory

Using the Virtual Machine as a base

If you are going to create a base Virtual Machine that  you will clone often, just never join it to the domain. Instead, take the time to get the system perfect and sysprep the Virtual Machine so it will join the domain and prompt for a computer name on first boot.

Sysprepping a Virtual Machine

Sysprep is eithe ron the ISO or already installed.

  1. Run c:\windows\system32\sysprep\sysprep.exe.
    (Or find sysprep on the ISO)
  2. For System Cleanup Action, choose Enter System Out-of-Box Experience (OOBE)
  3. For Shutdown Options, choose Shutdown.
  4. Click OK.
  5. Snapshot once the machine has shutdown.

Prevent the Virtual Machine from ever losing a trust with the domain

When a Windows Virtual Machine is joined to the domain, reverting can cause a huge delay, especially if the snapshot is from a while ago, because a machine and the domain have a trust based on a system password (that is all under the covers) and this password can update. When reverting after the password has changed, your reverted state will no longer have a trust with the domain. This can be prevented.

  1. Join your machine to the domain.
  2. Apply DisablePasswordChange registry key.
    Windows Registry Editor Version 5.00
    
    [HKEY_LOCAL_MACHINE\SYSTEM\CurrentControlSet\services\Netlogon\Parameters]
    "DisablePasswordChange"=dword:00000001
    
  3. Create a snaptshot called “Machine joined to domain, DisablePasswordChange set”.

For more information, read this post: Virtual Machines, Snapshots, Domain Membership, and trust relationship

Change the domain password requirements to be easy or off

Again, in lab environments, security is often traded for speed and efficiency. You may want to allow passwords that are blank or two characters.

Also, because of snapshots and reverting it will eliminate Virtual Machine problems if passwords never expire.

If your Active Directory server is also in your lab, you may be able to change the passwords requirements to be easy or even turn them off completely. If your Active Directory server is not in your lab, you may have to live with them.

Don’t clone machines joined to the domain

If you clone a machine joined to the domain, you have created two machines that have the same domain membership, which should be unique. If one machine changes, it can break the trust relationship for the other machine.

The only time you should clone a machine that is joined to the domain is when you plan to discard the Virtual Machine you are cloning from.

Other Steps

Everyone has unique needs, and these are supposed to be general needs. You should document your needs and add them to your Virtual Machine creation.

If you have an idea that isn’t listed here and it is a general step, please comment.

Is Windows 8 Pro Hyper-V the end of VMWare Workstation?

So I have had a license for VMWare Workstation through work since 2004. I have been a loyal user for eight years. However, my current job is not going to provide any further VMWare Workstation licenses.

Price of VMware Workstation vs Hyper-V

Because Hyper-V is included in Windows 8 Pro and the Microsoft Windows 8 Pro Upgrade is under $70 for a full version (not upgrade) of Windows 8 Professional System Builder DVD 64-Bit you are only looking at over $125.00 on sale (normally $199). VMWare Workstation alone is $249. VMWare Workstation is $50 more expensive than paying full retail price for the full version of Windows 8. If you are planning to buy Windows 8 Pro anyway, then technically, VMWare Workstation $249 too much.

Hyper-V vs VMWare Workstation

Having used both, I am going to mention some differentiating features.

  • Hyper-V virtual machines seem to snapshot and revert must faster than VMWare Workstation.
  • VMWare auto sizes the screen does, Hyper-V doesn’t.
  • VMWare workstation has a cool mode where you can run apps from the virtual machine as if they were regular desktop apps.
  • VMWare workstation works better with alternate operating systems.

There are advanced features that I haven’t tested. For example, when I worked at LANDesk we need to test PXE Booting so the ability for the virtual machine to PXE Boox was extremely important, and VMWare worked really well with PXE Booting. I haven’t tested Hyper-V with PXE Booting, so if you have please post and let me know if how it works.

Of course, don’t forget about Virtual Box. The open source edition, Virtual Box OSE, is free no matter what operating system is the host, whether it is Windows 8 or FreeBSD or Linux. It has been free for a while and yet VMWare Workstation is still popular so maybe it will remain popular despite Windows 8 Pro?

Installing VMWare Tools on FreeBSD 9

Virtualizing a FreeBSD server is common place. Knowing how to install VMWare Tools on a FreeBSD server without X11 is going to be extremely important. This article will provide the steps.

Lets get started.

Step 1 – Install FreeBSD as VMWare Guest.

Instructions for installing FreeBSD 9 are found here: How do I install FreeBSD 9?

It shouldn’t be much of an effort to follow these steps inside a VMWare guest.

Note: You may consider taking a snapshot here to save your current state.

Step 2 – Update FreeBSD and Install ports

Instructions for updating FreeBSD and installing ports are found here:
Update FreeBSD and Install ports

Note: You may consider taking a snapshot here to save your current state.

Step 3 – Install Prerequisites

Step 3.1 – Install Perl

Installing Perl is easy. Use either of the following commands.

From ports

# cd /usr/ports/lang/perl5.12
# make install

From packages

# pgk_add -r perl

Step 3.2 – Install compat6x-amd64

The compat6x-amd64 port is also easily installed.

From ports

# cd /usr/ports/misc/compat6x/
# make install

From packages

# pkg_add -r compat6x-amd64

Step 4 – Take a VMWare Snapshot

Important! Take a snapshot here! Do not skip this step.

Step 5 – Mount the VMWare Tools ISO

I am using VMWare workstation. Some steps may be slightly different if you are using ESXi or other VMWare solution.

  1. In VMWare Workstation, choose VM | Install VMWare Tools.
  2. In FreeBSD as root, create a directory to mount the CD-Rom to.
    # mkdir /cdrom
    
  3. Mount the cd-rom.
    # mount -t cd9660 /dev/cd0 /cdrom
    

Note: You may consider taking a snapshot here to save your current state.

Step 6 – Extract the vmware-freebsd-tools.tar.gz

Now that the drive is mounted, it should be easy to get to the vwmare-tools file.

  1. Copy the vmware-freebsd-tools.tar.gz file to a local location.
    # cp /cdrom/vmware-freebsd-tools.tar.gz /root
    
  2. Extract the vmware-freebsd-tools.tar.gz file.
    # cd /root
    # tar -xzf vmware-freebsd-tools.tar.gz
    

VMWare tools should now be extracted.

Step 7 – Recompile VMWare Tools Modules

Before you install VMWare tools on FreeBSD 9, you need the modules to work with FreeBSD 9. VMWare is slow to update the vmware tools for the FreeBSD guest. So you are just going to have to update them yourself.

Note: We are now at the point where we are going to do more and install more than you want to for your nice new clean server, but that is ok, because we have a snapshot and once we get the files compiled you can revert to the clean snapshot. Alternately if you have another FreeBSD system, you can do these steps on that system.

If you install without recompiling as of May 10, 2012, you will get this result.

Starting VMware Tools services in the virtual machine:
   Switching to guest configuration:                                   done
   Guest memory manager:                                              failed
   Blocking file system:                                              failed
   Guest operating system daemon:                                      done
Unable to start services for VMware Tools

Execution aborted.

Compiling the modules first should prevent the above failures.

Step 7.1 – Get FreeBSD Source

Download the FreeBSD Source as described here.

How to download FreeBSD source using svn?

Step 7.2 – Configure the /etc/make.conf

Right now there is a move toward compiling with clang over gcc. Because of changes due to this, you need to add the following line to your /etc/make.conf to compile with gcc. I have not tried to compile with clang yet.

  1. As root open the /etc/make.conf file with you favorite editor and add the following line:
    MK_CLANG_IS_CC=no
    
  2. Save and close the /etc/make.conf file.

Your /etc/make.conf is now configured.

Note 1: You may want to compile a custom kernel while you are at this. If so, check out this article: How to build and install a custom kernel on FreeBSD? If you do this, remember that you have to copy the new kernel to your clean system too.

Step 7.3 – Compile the vmmemctl module

Recompile vmmemctl using these steps.

  1. Go to the lib/modules/source directory under where you extracted vmware-freebsd-tools.tar.gz.
    # cd /root/vmware-tools-distrib/lib/modules/source/
    
  2. Extract vmmemctl.tar
    # tar -xf vmmemctl.tar
    
  3. Change to the vmmemctl-only directory.
    # cd vmmemctl-only
    
  4. Run make.
    # make
    
  5. Run make install.
    # make install
    

You have now built and installed the vmmemctl module.

Step 7.4 – Compile the vmblock module

  1. Go to the lib/modules/source directory under where you extracted vmware-freebsd-tools.tar.gz.
    # cd /root/vmware-tools-distrib/lib/modules/source/
    
  2. Extract vmblock.tar
    # tar -xf vmblock.tar
    
  3. Change to the vmblock-only directory.
    # cd vmblock-only
    
  4. Run make.
    # make
    
  5. Run make install.
    # make install
    

You have now built and installed the vmblock module.

Step 8 – Install VMWare Tools

You are now ready to install the VMWare Tools.

Note: If you are trying to keep you server clean and pristine, then copy the /root/vmware-tools-distrib directory off the server somewhere. THen revert to the snapshot you took just before Step 4. Copy the directory back to your clean snapshot and continue.

  1. Move into the directory created by the extraction.
    # cd /root/vmware-tools-distrib/
    
  2. Run vmware-install.pl
    # ./vmware-install.pl
    
  3. Select all the defaults.

Your vmware tools installation should go smoothly.

Why Technical Support Engineers are not all the same!

Technical Support Engineers are not all the same. There is an inclination in the industry to look down on Technical Support Engineers.

Recently the following article was published:
10 IT positions ranked by prestige

This article didn’t exactly identify the Technical Support Engineer role, but it was unfortunately encompassed in the bottom two positions with the lowest prestige, Technical and Help Desk Analyst.

Should a Technical Support Engineer have the lowest prestige of all technical jobs in the industry? If you think so, you might want to reconsider after read this.

There are multiple levels of technical support and you should know what level of technical support a person is in because that should significantly change your view of this persons technical skills and ability.

What they support and to what level they support it makes a major difference in how to view a Technical Support Engineers background.

Obviously there is a difference between someone who does tech support for a company like Cisco, Microsoft, LANDesk than someone who does technical support for a BowFlex. But this is an obvious difference. A chart that is more of gradient is needed.

Here is some information to help guide you in determining what experience a Technical Support Engineer really has in the technology industry.

1 – Complex product that requires knowledge of an entire area of technology, including both software and hardware environments

These engineers are often not just support engineers. Along with being an expert on their product, they must understand many other concepts such as Networking, Servers and server-side software such as Web Servers, Database Servers, DNS servers, DHCP servers and more. It is not enough to just know how to set up their software, they have to know how to set up the environment around it. They also have to know how to troubleshoot to deep levels both their software and the environment around it.

Usually these engineers practice during portions of their job being Systems Analysts, Consultants, Sales Engineers, IT administrators, Change Controls administrators, developers, and more. They deal will the full gamut of technology and all the areas around it.

Example companies

Desktop Management companies such as LANDesk, SCCM, Kace.
Network Manager Software such as HP OpenView

2 – Specialized product that requires knowledge of one major portion of an IT or Software Environment

These engineers are often not just support engineers. Along with being an expert on their product, they must understand many other concepts in the technology world. It is not enough to just know how to set up their software, they have to know how to set up some portion, though not all, of the environment around it. They also have to know how to troubleshoot to deep levels both their software and their portion of the environment around it.

Like above, these engineers have some limited consulting experience and are gaining understanding of change control and IT administrative processes along with being technology experts.

Example companies

Support for Network Equipment such as Cisco, Juniper Networks, etc…

3 – Specialized product that requires knowledge of a single area of an IT or Software Environment

This person is an expert on their software or hardware product as well as an expert in one or more areas surrounding it.

Individuals who excel here are usually are ready to explode into a new technology after a little as one year in this position.

Example Companies

Business intelligence software, such as QlikView.
Dell, HP and other computer resellers.
Simple Appliances, such as a NAS.
Any company’s internal Computer Help Desk (but be aware of glorified password resetters)

4- Specialized product that requires technical knowledge but only for that exact product

This person is an expert on their software or hardware product but there is not indication they know anything else about technology from this position, which doesn’t mean they don’t, just that this position doesn’t indicate it.

Example Companies

Home consumer products such as Wireless Routers from D-Link, Linksys, etc.

5 – Specialized product that requires knowledge in an area outside of IT but still somewhat technical

This person is an expert on their software or hardware product as well as an expert in one or more areas surrounding it.
Usually this product has interfaces into other technology that not used commonly but Technical Support Engineers usually don’t take the common calls for things that just work, they learn the tough issues, which usually involves integrating with something else. However, they don’t always know that area of technology, just the minimal knowledge to make their product work with it.

Example companies

Software Applications outside of IT: Microsoft Word, Excel.

6 – Specialized product that requires knowledge in an area outside of IT but not exactly technical

This person is an expert on their software or hardware product as well as an expert in one or more areas surrounding it. This expertise is beneficial outside the position but only in limited areas.

Example companies

Software Applications outside of IT:
Adobe Photoshop
Dentrix
gaming software

7 – Specialized product that requires knowledge that is technical but not really related to software or IT at all

This person is an expert product but it is just a simple product that being an expert on it really has no value anywhere else.

Example companies

Television
Cable box companies
radios and sound systems
Cell-phones

8 – Generic product that requires little technical knowledge

This person usually supports something that is sold on a made-for-tv ad, such as an exercise appliance. They usually have a script they follow and this position can be filled by almost anyone who can read and speak.

Example companies

BowFlex
Clock Radios

VirtualBox on FreeBSD – Don’t use lagg0 and don’t use NAT

So my networking on my host has been extremely slow and choppy on my VM guests. I read somewhere to not use NAT but when I tried to turn off NAT, I could never get and IP address. Turns out that was the fault of lagg.

I have disabled lagg and configured my VMs to use bridging mode and suddenly my host is extremely fast.

Also, when I accidently configured my VM to use iwn0 instead of wlan0, the system hung, followed by a reboot.

So lets sum up the three tips for using VirtualBox on FreeBSD:

  1. Don’t use lagg on the host.
  2. Don’t use NAT.
  3. Don’t configure the guest to use your wireless device using iwn0, but make sure to use wlan0.

VMWare, RDP (MSTSC), WPF, and DisableHWAcceleration

I don’t know if you, like me, have a development box running Visual Studio 2010 and VMWare workstation. I develop in C# and WPF, and test the product in a VM. Then sometimes, when I work from home, I remote desktop into my development box.

When I am using RDP to remote control a VMWare Workstation host, and I run a WPF Application inside a VM, the WPF application doesn’t display. The window opens, and you see the frame of your windows, but the inside is just blank or a white/gray box. None of the WPF Controls are visible.

I have found two ways to fix this. One is permanent and one is temporary.

Option 1 – (Permanent) Set this registry key. Read more about this here on MSDN: Graphics Rendering Registry Settings

Windows Registry Editor Version 5.00

[HKEY_LOCAL_MACHINE\SOFTWARE\Microsoft\Avalon.Graphics]
"DisableHWAcceleration"=dword:00000001

Option 2 – (Temporary) Or just reboot the VM while connected to the VMWare Workstation host via RDP. It seems that the VM boots and the OS detects the lack of support and disabled hardware acceleration. However, once you reboot when you are not RDP’ed into the VMWare Workstation host, you have hardware acceleration back.

I took me a long time to figure this out, because there was little to nothing in a Google search. I came across this solution while looking for something else a month or so ago, and needed to use it again when working from home last night. I thought I would post it so I never have to look for it again.

Playing DOS games on FreeBSD

I don’t know if many of you remember my post on old DOS games and how easy it is to play them using DOSBox.  Well, it may not surprise you that you can easily install DOSBox on FreeBSD. And yes, on FreeBSD you can play all your favorite old DOS games.

Of course, I assume you have a FreeBSD desktop.

Installing DOSBox on FreeBSD

To install from ports, do this:

#
#
cd /usr/ports/emulators/dosbox
make install

To install from packages do this:

# pkg_add -r dosbox

Configuring DOSBox on FreeBSD

Create a folder, probably in your home directory but it can be where ever you want, to store your DOS games.

# mkdir ~/Games/dos

The configuration file is in your home director: ~/.dosbox/dosbox-0.74.conf

Add the following line to the end of the config under the [autoexec] section.

# echo mount c /usr/home/username/Games/dos/ >> ~/.dosbox/dosbox-0.74.conf

Note: Make sure you have hte trailing slash ‘/’ as the path you mount to must end in a slash.

Running DOSBox on FreeBSD

DOSBox installs to /usr/local/bin/dosbox which is in $PATH so you can run DOSBox at anytime by simply typing in dosbox in a shell.

However, you can create an entry for it in KDE’s menu if you want.

DosBox

Now before you go on, type in intro and read each page as you will get lots of important information about how to use DOSBox in the intro.

C:\> intro

Now make sure to read these pages. They tell you how to go full-screen, capture/release your mouse, etc…

Downloading DOS Games

As mentioned in my previous post about DOS games, you can go here to this cleverly named site to download a lot of DOS games.

Abandonia

Loading a DOS Game

It is just like DOS.  Change to the directory where your game is and run the games exe file.

For example, if you downloaded The Bard’s Tale II: The Destiny Knight, you would type the following:

Z:\> c:
C:\> cd BARD\BARD2
C:\BARD\BARD2> DK.EXE

And your game is launched.

Have fun.  It would takes years to play all the old DOS games at Abandonia.

Installing Windows 7 into a virtual machine on FreeBSD using VirtualBox

My job at LANDesk requires that I write code in C# for an application that only runs on Windows Server.  I also have to test a lot of code on Windows 7. Like me, so many people are forced to run a version of Windows because they have special windows applications at work or because that is the platform we are developing for in our jobs.

If running windows is a must for you, as it is for me, then moving to FreeBSD exclusively is just not an option.  I want to run an FreeBSD, but running Windows 7 is a must too.

At first VMWare Workstation looked like it was going to solve this problem. But while its early versions worked on FreeBSD, they failed to port newer versions over.  Quemu just never could get to level of usability needed.  Well, along comes VirtualBox from Sun.  Sun, now Oracle, released an open source edition cleverly named VirtualBox Open Source Edition (OSE).  Like many of Sun’s code, it is duel licensed.

Prerequisites

  1. A FreeBSD desktop – Hopefully you are here because you already have this.  If you don’t have a FreeBSD desktop, you can follow my guide to build one.
    How to install and configure a FreeBSD 8 Desktop with Xorg and KDE?
    Or you can install and use PC-BSD which is a nice desktop version of FreeBSD.
  2. A Windows 7 DVD or ISO and a product key.  Please do not pirate!

Step 1 – Installing VirtualBox OSE on FreeBSD 8.1

Installing VirtualBox is not complex. It involves only a few steps.

  1. Go to the directory for virtualbox-ose in your ports tree.
    # cd /usr/ports/emulators/virtualbox-ose
  2. Configure your installation.
    # make config
  3. Select Guest Additions, as it is not selected by default.
    Note: The defaults are Qt4, DBUS, X11, NLS and they should remain checked.
  4. You may also want to select VNC.
  5. Install virtualbox-ose
    # make install

Step 2 – Configuring FreeBD for Virtual Box

There are few things we need to configure on the FreeBSD system to make VirtualBox work.

  1. Add users to the vboxusers.
  2. Configure CD/DVD drive access.
  3. Configure VirtualBox kernel modules to load.

Step 2.1 – Adding use to the vboxusers group

  1. To add users to the group, use this command:
    FBSD# pw groupmod vboxusers -m SomeUserName

Step 2.2 – Configure CD/DVD drive access

Note: This is a copy of what is in my document for building a FreeBSD Desktop.

FreeBSD is more secure by default, so something as simple as accessing a CD or DVD or USB drive is not actually allowed by default. You have enable this.

These steps assume that your user is a member of the operator group. Remember above during the installation, I mentioned to make your user a member of both the wheel and operator groups.

  1. Access a shell and su to root.
    Note: The easiest shell to access now that you are in KDE is Konsole. To access Konsole, click the K and go to Applications | System | Terminal. Also you can add the shell icon to your panel by right-clicking on the icon and choosing Add to Panel.
  2. Enable vfs.usermount.
    FBSD# sysctl -w vfs.usermount=1
  3. Configure vfs.usermount to be enabled on boot.
    FBSD# echo vfs.usermount=1 >> /etc/sysctl.conf

  4. Open the following file with an editor: /etc/devfs.conf
    FBSD# ee /etc/devfs.conf

  5. Add the following lines:
    # Allow all users to access CD’s
    perm /dev/acd0 0666
    perm /dev/acd1 0666
    perm /dev/cd0 0666
    perm /dev/cd1 0666# Allow all USB Devices to be mounted
    perm /dev/da0 0666
    perm /dev/da1 0666
    perm /dev/da2 0666
    perm /dev/da3 0666
    perm /dev/da4 0666# Misc other devices
    perm /dev/pass0 0666
    perm /dev/xpt0 0666
    perm /dev/agpart 0666
    perm /dev/uscanner0 0666

    Note: Yes, I copied these from a PC-BSD install’s version of this file.

    Note: Change to 0660 to only allow users in the operator group to mount drives.

  6. Edit the /etc/devfs.rules file.
    FBSD# /etc/devfs.rules

  7. Edit the following file: /usr/local/etc/PolicyKit/PolicyKit.conf
    FBSD# ee /usr/local/etc/PolicyKit/PolicyKit.conf

  8. Change the xml’s config section from this…
    <config version="0.1">
        <match user="root">
            <return result="yes"/>
        </match>
        <define_admin_auth group="wheel"/>
    </config>
    

    …to this:

    <config version="0.1">
            <define_admin_auth group="operator"/>
            <match action="org.freedesktop.hal.storage.mount-removable">
                    <return result="yes"/>
            </match>
            <match action="org.freedesktop.hal.storage.mount-fixed">
                    <return result="yes"/>
            </match>
            <match action="org.freedesktop.hal.storage.eject">
                    <return result="yes"/>
            </match>
    </config>
    
  9. Edit the following file with ee: ee /etc/fstab
    FBSD# ee /etc/fstab

  10. See if there is a line in the fstab for your CD/DVD-Rom. Comment out or remove the line for your /cdrom. I usually just comment it out by adding a # sign as shown:
    #/dev/acd0 /cdrom cd9660 ro,noauto 0 0
  11. Restart the computer.

You should now be able to mount CD, DVD, and USB drives. You also should be able to both read and write to them, burn disks, write and format USB drives, etc…

Step 2.3 – Configure VirtualBox kernel modules to load

  1. As root, edit the /boot/loader.conf file.
    # ee /boot/loader.conf
  2. Add the following text:
    # VirtualBox
    vboxdrv_load=”YES”
  3. Save and close the file.
  4. Edit the /etc/rc.conf file.
  5. Add the following text.
    # VirtualBox
    vboxnet_enable
  6. Save and close the file.

Step 3 – Creating your Windows 7 VirtualBox

  1. Launch Virtual Box.
    Note: VirtualBox registers itself with the KDE menu.  On my installation, it was in Lost & Found, but on PC-BSD it was under System.  Either way you can type VirtualBox in the KDE menu search and find it.  Also, VirtualBox is the command and it should in $PATH so you should be able to open any shell from your desktop environment and run VirtualBox and have it open.
  2. Click New. This brings up a Wizard.
  3. Follow the wizard.
    Ok, if you need help with the wizard, here are my steps.
  4. Read and click Next.
  5. Choose an easy name.  I used “W7”.
  6. Make sure the Operating System is set to Microsoft Windows.
  7. Change the Version to Windows 7 (64-bit) or if you are on 32 bit hardware still use just Windows 7.
  8. Click Next.
  9. Allow at least 1536 MB (1.5 GB) for the base memory size.  You can get away with less if you need to. You can do better with more if
  10. you want to.
  11. Click Next.
  12. The Virtual Hard Disk page is already configured correctly, Boot Hard Disk is checked and Create new hard disk is selected. So just click next.
  13. Read and click Next.
  14. For Hard Disk Storage Type, I left it set at Dynamically expanding storage.
    Comment: This means that even if you use a 100 GB drive, it will only physically use as much space as Windows 7 has used in the Virtual Drive. So if Windows 7 is using 10 GB, even if you have 100 GB drive, the physical size on disk is only 10 GB.  This is important information for the next screen.
  15. Click Next.
  16. I change the drive size to 50 or 100 GB.
    Comment: It doesn’t really matter, but it is best to not run out of space either virtually or physically. Read my comment in the previous step.
  17. Click Next.
  18. Read and click Finish.

You virtual Machine now shows in the list.

Lets move to the next step.

Step 4 – (Optional) Changing Settings on your Windows 7 VirtualBox

I make two changes to my Windows 7 virtual box. As noted above this is optional, but I like to do them.

  1. Click the settings.
  2. Click System.
  3. Change the boot order to be hard drive first.
    Note: I make this change because it annoys me it when I install and then reboot the machine after the install and it boots right back to the install media. So I make this change and the press F12 during boot to the CD once.
  4. Uncheck and get rid of the floppy. (Does anyone still use those?)

  5. Now click on Storage.
  6. Under the Storage Tree, select your optical drive.
  7. If you are using an ISO, change the CD/DVD Device to point to the ISO. If you are using a DVD, as I am, choose Host Drive.  My host drive says: Host Drive Optiarc DVD RW AD-7910A (cd0).  I assume everyone drive will show up slightly different, but should start with Host Drive.
  8. Click OK.

Your settings should be good to go.

Step 5 – Install Windows 7

Now it is time to install Windows 7.

Don’t pirate! Use a legal product key. Again, just because I like open source does not make me anti closed source. I am not a Microsoft hater and I would hope you aren’t either. Even if you are, that is no excuse for pirating.

  1. Insert the DVD into your DVD drive, unless you are using an ISO and have already connected it.
  2. Click the Start icon.
  3. A new installation window will popup.
    Important! You may get a lot of popups telling you about important tips for using VirtualBox. Take time to read them. If you don’t read them or don’t already know what they are telling you, you will wish you had read them.
  4. Click in the window and to have it take control of your mouse and keyboard.
  5. Press F12 to choose your boot option.
     

    Note: If you miss this, that is OK,  you can restart the VM and try to be quicker.

  6. Once you have pressed F12 in time, you will see the following screen. At this screen, press the letter next to DVD drive.
  7. Press a key when prompted to boot to the Windows 7 media.

Well, you are off to installing Windows 7.  Hopefully you can get Windows 7 installed on your own, cause I am not here to walk you through doing that. Don’t worry, the install media for Windows 7 should be easy enough for you to follow if this is your first time.

Once finished, you will be running Windows 7 on FreeBSD.

Step 6 – Install VirtualBox Guest Additions

Even though all the devices are virtual, drivers are still needed. VirtualBox guest additions installs most of these drivers as well as other features of VirtualBox.

  1. Log in to your Windows 7 install.
  2. Select Device | Install Guest additions.

    This will mount an ISO and start the installer for VirtualBox Guest Additions inside Windows 7.

  3. Click Run VBoxWindowsEditions.exe.
  4. Follow the wizard.
    Note: I use the default install location and I check the option to Use Direct 3D support.
  5. Reboot when prompted.

Step 7 – Install the sound card driver

The sound card driver must be installed. VirtualBox uses a virtual device representing the Realtek AC’97 sound card.

  1. Log back into Windows 7.
  2. Go to the following web site:
    http://download.cnet.com/Realtek-AC-97-Driver-Windows-Vista-Windows-7/3000-2120_4-10962344.html
  3. Download and install the Realtek AC’97 Driver.
  4. Reboot when prompted.

Your Finished

You now have Windows 7 running. Now you can have the great experience of using FreeBSD as your primary OS and load Windows 7 when you need something requires windows, like I do.

Sources:
http://wiki.freebsd.org/VirtualBox
http://forums.freebsd.org/showthread.php?t=18699
The virtualbox-ose port’s pkg-message

Virtual Machines, Snapshots, Domain Membership, and trust relationship

Ok, so many of you have reverted to a snapshot of a virtual machine that is a member of an Active Directory domain only to see the error message saying something like this:

In XP:
“Windows cannot connect to the domain, either because the domain controller is down or otherwise unavailable, or because your computer account was not found. Please try again later. If this message continues to appear, contact your system administrator for assistance.”

In Windows 7:
“The trust relationship between this workstation and the primary domain failed.”

This happens whether you are using VMWare or VirtualBox. It also happened back when we were re-imaging to “revert” our drives.

This is caused because the Machine creates an account on the Domain. It actually maintains its own password and updates its own password every 30 days.  So as soon as the Machine account’s password is updated, you are going to be in this state.

Well, I started thinking that there has to be a solution for this. I found this article:
Working with Domain Member Virtual Machines and Snapshots

It mentions a possible option.

“Increase the computer account password age, or disable password changes altogether. Both these can reduce likelihood of the problem, but may reduce the level of security in the domain. On the other side, since this is probably a test, a QA or a demo environment, you may consider it as a valid option . These settings are available on the domain member (and not on the domain controller), and as such, you can change them on your computer before you create a snapshot out of it.”

While he mentions that it can be done, he doesn’t mention how to do it.  There is a Microsoft Knowledge-base article about this.  This is a WIndows 2000 article, but I will have to verify that it works in later versions.
How to disable automatic machine account password changes

It basically says to set this registry key:

KEY: HKEY_LOCAL_MACHINE\SYSTEM\CurrentControlSet\Services\Netlogon\Parameters
Property: DisablePasswordChange
Value: 1

Windows Registry Editor Version 5.00

[HKEY_LOCAL_MACHINE\SYSTEM\CurrentControlSet\services\Netlogon\Parameters]
"DisablePasswordChange"=dword:00000001

You may be able to do this on the Domain controller, by using this setting:

KEY: HKEY_LOCAL_MACHINE\SYSTEM\CurrentControlSet\Services\Netlogon\Parameters
Property: RefusePasswordChange
Value: 1

Windows Registry Editor Version 5.00
 
[HKEY_LOCAL_MACHINE\SYSTEM\CurrentControlSet\Services\Netlogon\Parameters]
"RefusePasswordChange"=dword:00000001

So I am going to try the first one, as it doesn’t require a global setting on the domain.  Lets see if it really works.

Update

I put the first registry key on all my VMs back when this was posted, which looks like October 22, 2010.  I haven’t had the problem since, so I would say this solution works.

I don’t know if the second key that goes on a Domain Controller works.  Maybe some one can try it out for me.

VirtualBox: It seems ready

Ok, so because my work has given me a license to VMWare Workstation, I have never really gone to the trouble of using VirtualBox.

But I really want to move to use FreeBSD (well, PC-BSD) on my laptop but I have to have a Windows 7 box for work.

So I had Windows 7 with PC-BSD in a VMWare Virtual Machine.

However, I am switching that as we speak.

I now have PC-BSD installed as my primary operating system, and Windows 7 in a VirtualBox Virtual Machine.

There are some features we use at LANDesk a lot, such as many snapshots, and PXE booting, and more.  I will test and follow-up on whether this is a good solution for me.

Ahhh…the dying vmware network is back…

Ok, so I posted this a while ago:
Why does VMWare guests lose network access constantly on Windows 7 64 bit?

Well this issue didn’t happen from the middle of December until last week, it started again.

I toggled a bunch of settings, but every setting is correct. There must be something else causing this.

Update: Found this. I will set my NIC to not go to sleep and see if that works. Seems like a bug to me.
http://communities.vmware.com/message/1462154#1462154

Update: That didn’t work.
Yeah, my computer went to sleep anyway, and with that setting, I couldn’t wake it up remotely. Lame.

(Resolved) ShrewSoft VPN Proxy Services Blocks DNS Requests for VMWare Workstation Guests

UPDATE: 3/5/2010
2.1.6 beta 6 addresses this issue, so please install this version and ignore the rest of the comments below.

Ok, so I am big support of ShrewSoft VPN Client and I am also a user of VMWare Workstation. However, I have found an incompatibility between the two.

I tell everyone here at work to use ShrewSoft VPN Client on their Windows 7 64 bit clients. However, they are all running VMWare as well. So I feel it is my responsibility to also inform them of this issue that was found by one of my coworkers.

PROBLEM
Well, a strange problem is seen on VMWare Guests running on a host with ShrewSoft VPN Client installed. No DNS requests are going out for the Guest. A DNS Request never leaves the host.

Troubleshooting
I seached the following term on the VMWare forums: DNS Bridged

The following VMWare Community discussion appeared:
DNS Name Resolution using a bridged network connection not working

Resolution
If you stop the ShrewSoft DNS Proxy Daemon, then the issue goes away.

Also, this is not really a reason to stop using ShrewSoft VPN. There is a post about Cisco’s VPN Client firewall causing the same issue.
Problems with networking using Workstation 7

How to install VMWare-tools on FreeBSD 8 or PC-BSD 8?

I have documentation on how to create a FreeBSD 8 Desktop environment here:
How to install and configure a FreeBSD 8 Desktop with Xorg and KDE?

However, if you install FreeBSD or PC-BSD as a VMWare guest, you will want to install two additional pieces of software when you are finished:

  1. You need to install the VMWare X11 driver (no, it will not be installed when you install the VMWare tools)
  2. You need to install VMWare-tools

This guide is to walk you through resolving the second of these two issues. I assume you followed my article for building the FreeBSD desktop, and if you did, these steps will work for you. But if you didn’t, I can’t guarantee that there won’t be some steps that are slightly different for you.

In order for me to consider the VMWare-Tools installed and working, the following features must work:

  • Clipboard Synchonization
  • Grab/Release Mouse Input when mouse enters/leaves the guests screen
  • Autofit Guest (automatically making the guests screen resolution take all available space)
  • Time Synchronization (the time in the VMWare guest will match the hosts time).

In this document, I successfully get these features working.

I have VMWare Workstation 6.5.3 build 185404 and the host is Windows 7.

Part 1 – Installing and Configuring the VMWare X11 Driver

Already posted on this here:
How to install the vmware video card driver on a FreeBSD 8 guest virtual machine?

Part 2 – Installing and Configuring VMWare Tools

Step 1 – Mount the VMware Tools virtual cd

  1. On the VMWare hosts make sure that your FreeBSD guest is selected and that you are not full screen so you have the VMWare Workstation application surrounding the FreeBSD guest.
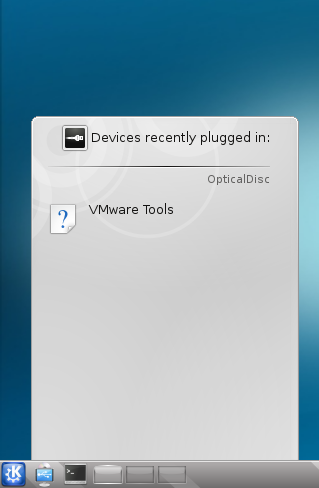
  2. From the VMWare Workstation application, choose VM | Install VMWare tools…You will see a pop-up inside FreeBSD on the bottom left.
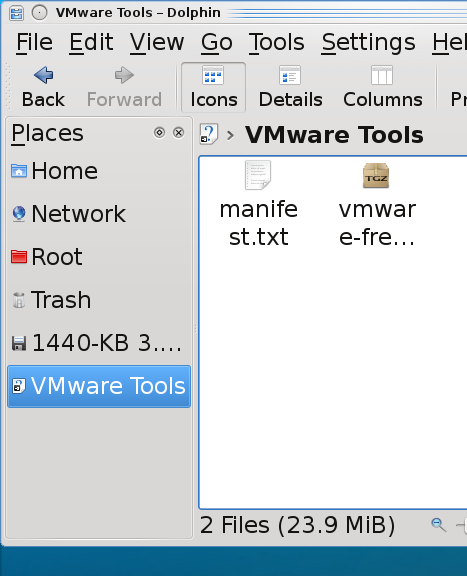
  3. Click on the popup where it says VMWare Tools. This will open Dolphin file browser.
  4. In the Dolphin file browser on the bottom left, you should see the VMWare Tools media. Click on it.

Step 2 – Extract the vmware-freebsd-tools.tar.gz

  1. Right click on vmware-freebsd-tools.tar.gz and choose Extract Archive to… Now you can extract to where you want, as long as you have the folder permission to write to, but the next steps describe where I extracted it to.
  2. Click on Home at the left. There is no need to create a folder as the extacted files will all be in one folder called vmwware-tools-distrib when extracted.
  3. Click OK. The vmware-freebsd-tools.tar.gz is extracted.

Step 3 – Open a shell as root

  1. Cick K | Applications | System | Konsole to open the shell.
  2. Type in su$ su
    Password:
    #

Step 4 – Install the freebsd6 compatibility package.

  1. Determine your architecture or processor type. If you are 64 bit, it will be amd64 even it is intel 64 bit. If you are 32 bit, it is likely x86. Type uname -a to determine what your architecture is and look at the last piece of information provided.

    # uname -a
    FreeBSD FBSD8.hsd1.ut.comcast.net. 8.0-RELEASE-p2 FreeBSD 8.0-RELEASE-p2 #0: Tue Jan 5 21:11:58 UTC 2010 root@amd64-builder.daemonology.net:/usr/obj/usr/src/sys/GENERIC amd64
    #

  2. Install the compat6x-[arch].tgz package, where you replace [arch] with your architecture.  This is already installed on PC-BSD.
    # pkg_add -r compat6x-amd64

Step 5 – Compile and Install the vmware-freebsd-tools

  1. Change to the directory where you extracted the vmware-freebsd-tools.tar.gz.

    # cd /home/jared/vmware-tools-distrib

  2. Run vmware-install.pl.# ./vmware-install.pl

    Just keep hitting enter and accepting the defaults until the vmware-tools are installed.

Step 6 – Start vmware tools

  1. As root run the following:

    # /usr/local/etc/rc.d/vmware-tools.sh start

    Or you could just reboot.

    Note: Since vmware-tools doesn’t exactly integrate with rcNG, you don’t need to add anything to /etc/rc.conf. The just dump a script into /usr/local/etc/rc.d and it is just a shell script and isn’t formatted to require it to be enabled by /etc/rc.conf.

Step 7 – Enabling VMWare user features
The vmware-user process must be launched to enable vmware-user features.

  • Clipboard Synchonization
  • Grab/Release Mouse Input when mouse enters/leaves the guests screen
  • Autofit Guest (automatically making the guests screen resolution take all available space)
  1. Configure vmware-user to run at KDE login by copying the /usr/local/bin/vmware-user shell script to the ~/.kde4/Autostart directory.  You could also create a symlink.
    $ cp /usr/local/bin/vmware-user ~/.kde4/Autostart

    Note: You don’t have to use the command.  In the System Settings under Advanced |Autostart there is an option to Add Script that you can use.

  2. Logout of KDE and log back in.

Step 8 – Running the VMWare-Toolbox
There may be some vmware settings you want to change on the VMWare guest. Not many are configurable through the vmware-toolbox on FreeBSD but at least one is configurable here called Time Synchronization. This feature will synchronize your vmware guest’s time with the hosts time.

  1. Run vmware-toolbox

    $ vmware-toolbox

  2. Check the box to enable time synchronization
  3. Feel free to explore and become familiar with the other settings, there aren’t many and two of the settings can only run as root.

Tuning Recommendations
I found a lot of tuning recommendations. However, if you chose Other | FreeBSD or Other FreeBSD 64 when creating your vm, these first two are set by default.

  1. It is recommended to have kern.hz set to 100 and it is by default so nothing to do here.
  2. It was recommended that on the host, in the vmx config file for the guest, that the following be configured:
    • ethernet0.virtualDev = “e1000”

    Again, if you chose Other | FreeBSD or Other FreeBSD 64 when creating your vm, this is set by default.

  3. Some people will recommend this setting in the vmx config file as well:
    • tools.syncTime = “TRUE”

    However, this is the same as the time synchronization setting we configured with the vmware-toolbox. It is safer to make the configuration in the vmware-toolbox tool.

If you know of any further tuning options, please comment them to me.


Copyright ® Rhyous.com – Linking to this article is allowed without permission and as many as ten lines of this article can be used along with this link. Any other use of this article is allowed only by permission of Rhyous.com.