How to install VMWare-tools on FreeBSD 8 or PC-BSD 8?
I have documentation on how to create a FreeBSD 8 Desktop environment here:
How to install and configure a FreeBSD 8 Desktop with Xorg and KDE?
However, if you install FreeBSD or PC-BSD as a VMWare guest, you will want to install two additional pieces of software when you are finished:
- You need to install the VMWare X11 driver (no, it will not be installed when you install the VMWare tools)
- You need to install VMWare-tools
This guide is to walk you through resolving the second of these two issues. I assume you followed my article for building the FreeBSD desktop, and if you did, these steps will work for you. But if you didn’t, I can’t guarantee that there won’t be some steps that are slightly different for you.
In order for me to consider the VMWare-Tools installed and working, the following features must work:
- Clipboard Synchonization
- Grab/Release Mouse Input when mouse enters/leaves the guests screen
- Autofit Guest (automatically making the guests screen resolution take all available space)
- Time Synchronization (the time in the VMWare guest will match the hosts time).
In this document, I successfully get these features working.
I have VMWare Workstation 6.5.3 build 185404 and the host is Windows 7.
Part 1 – Installing and Configuring the VMWare X11 Driver
Already posted on this here:
How to install the vmware video card driver on a FreeBSD 8 guest virtual machine?
Part 2 – Installing and Configuring VMWare Tools
Step 1 – Mount the VMware Tools virtual cd
- On the VMWare hosts make sure that your FreeBSD guest is selected and that you are not full screen so you have the VMWare Workstation application surrounding the FreeBSD guest.
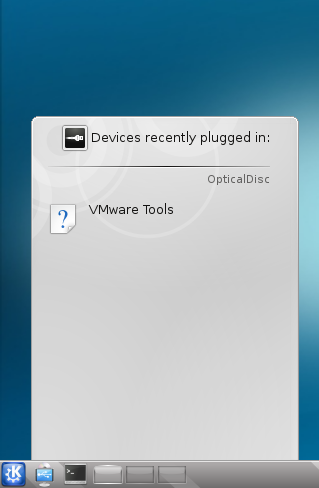
- From the VMWare Workstation application, choose VM | Install VMWare tools…You will see a pop-up inside FreeBSD on the bottom left.
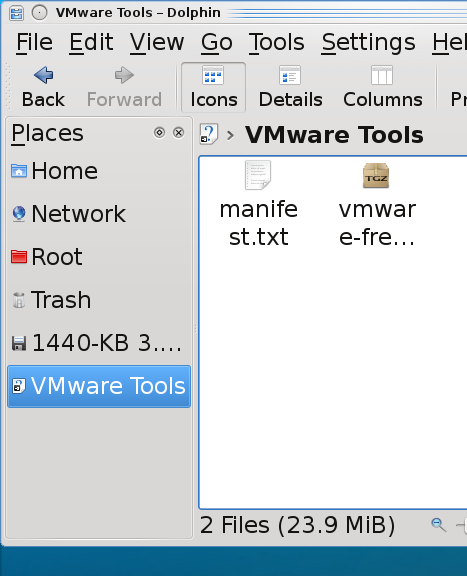
- Click on the popup where it says VMWare Tools. This will open Dolphin file browser.
- In the Dolphin file browser on the bottom left, you should see the VMWare Tools media. Click on it.
Step 2 – Extract the vmware-freebsd-tools.tar.gz
- Right click on vmware-freebsd-tools.tar.gz and choose Extract Archive to… Now you can extract to where you want, as long as you have the folder permission to write to, but the next steps describe where I extracted it to.
- Click on Home at the left. There is no need to create a folder as the extacted files will all be in one folder called vmwware-tools-distrib when extracted.
- Click OK. The vmware-freebsd-tools.tar.gz is extracted.
Step 3 – Open a shell as root
- Cick K | Applications | System | Konsole to open the shell.
- Type in su$ su
Password:
#
Step 4 – Install the freebsd6 compatibility package.
- Determine your architecture or processor type. If you are 64 bit, it will be amd64 even it is intel 64 bit. If you are 32 bit, it is likely x86. Type uname -a to determine what your architecture is and look at the last piece of information provided.
# uname -a
FreeBSD FBSD8.hsd1.ut.comcast.net. 8.0-RELEASE-p2 FreeBSD 8.0-RELEASE-p2 #0: Tue Jan 5 21:11:58 UTC 2010 root@amd64-builder.daemonology.net:/usr/obj/usr/src/sys/GENERIC amd64
# - Install the compat6x-[arch].tgz package, where you replace [arch] with your architecture. This is already installed on PC-BSD.
# pkg_add -r compat6x-amd64
Step 5 – Compile and Install the vmware-freebsd-tools
- Change to the directory where you extracted the vmware-freebsd-tools.tar.gz.
# cd /home/jared/vmware-tools-distrib
- Run vmware-install.pl.# ./vmware-install.pl
Just keep hitting enter and accepting the defaults until the vmware-tools are installed.
Step 6 – Start vmware tools
- As root run the following:
# /usr/local/etc/rc.d/vmware-tools.sh start
Or you could just reboot.
Note: Since vmware-tools doesn’t exactly integrate with rcNG, you don’t need to add anything to /etc/rc.conf. The just dump a script into /usr/local/etc/rc.d and it is just a shell script and isn’t formatted to require it to be enabled by /etc/rc.conf.
Step 7 – Enabling VMWare user features
The vmware-user process must be launched to enable vmware-user features.
- Clipboard Synchonization
- Grab/Release Mouse Input when mouse enters/leaves the guests screen
- Autofit Guest (automatically making the guests screen resolution take all available space)
- Configure vmware-user to run at KDE login by copying the /usr/local/bin/vmware-user shell script to the ~/.kde4/Autostart directory. You could also create a symlink.
$ cp /usr/local/bin/vmware-user ~/.kde4/AutostartNote: You don’t have to use the command. In the System Settings under Advanced |Autostart there is an option to Add Script that you can use.
- Logout of KDE and log back in.
Step 8 – Running the VMWare-Toolbox
There may be some vmware settings you want to change on the VMWare guest. Not many are configurable through the vmware-toolbox on FreeBSD but at least one is configurable here called Time Synchronization. This feature will synchronize your vmware guest’s time with the hosts time.
- Run vmware-toolbox
$ vmware-toolbox
- Check the box to enable time synchronization
- Feel free to explore and become familiar with the other settings, there aren’t many and two of the settings can only run as root.
Tuning Recommendations
I found a lot of tuning recommendations. However, if you chose Other | FreeBSD or Other FreeBSD 64 when creating your vm, these first two are set by default.
- It is recommended to have kern.hz set to 100 and it is by default so nothing to do here.
- It was recommended that on the host, in the vmx config file for the guest, that the following be configured:
- ethernet0.virtualDev = “e1000”
Again, if you chose Other | FreeBSD or Other FreeBSD 64 when creating your vm, this is set by default.
- Some people will recommend this setting in the vmx config file as well:
- tools.syncTime = “TRUE”
However, this is the same as the time synchronization setting we configured with the vmware-toolbox. It is safer to make the configuration in the vmware-toolbox tool.
If you know of any further tuning options, please comment them to me.
Copyright ® Rhyous.com – Linking to this article is allowed without permission and as many as ten lines of this article can be used along with this link. Any other use of this article is allowed only by permission of Rhyous.com.


